
English Articles
- The Vanishing of Stars, Part II: The Achilles Heel of the ISD
- The Vanishing of Stars, Part III: Admiral Darth Veggie Interviews PT106
- Armada: Why to Start at All?
- Turning a Trap - Prologue
- Turning a Trap - Round 1
- Grand Battles: An Epic Play Alternative to the Sector Fleet Rules
- Grand Battle: LTD vs. Darth Veggie - A Glorious Collection of Wrong Decisions Part I
Grand Battle: LTD vs. Darth Veggie - A Glorious Collection of Wrong Decisions, Part I
After publishing my Grand Battle rules here, I found quickly a person I could persuade in playtesting them with me on VASSAL. The poor fellow that agreed to test this accumulation of half-baked epic play rules is Dave from Australia, known as LTD on the FFG boards and within the VASSAL community.
When I started playing Armada on VASSAL in spring 2016, LTD was one of the first persons I have played against - and is since those times one of my favorite recurring VASSAL encounters. Hence, I was especially happy when he agreed in playtesting the Grand Battle rules (and I have a score to settle: our first game I lost against him and his despicable Ackbar Conga Line he used to play in those days; so I hoped for an epic revange).
Because he also has a blog (click here) where he writes reports of his matches we decided on that we both would commentate on our Grand Battle on our blogs, each of us offering our individual perspective on the match.
We choose to play Grand Battle level III (1200 fleet points per side) in order to make it possible to field a fully equiped Executor II-class SSD and still be able to field some other ships.
Because LTD always and only plays the rebel side, I choose the Empire. The fleet I came up with tries to be a well balanced approach to epic play:
- It is commanded by Darth Vader himself on a fully decked out Executor II-class Star Dreadnought - a massive 520 point sink! In addition it includes:
- A Cymoon
- An Interdictor
- Demolisher
- Squall
- The Hand of Justice
- 2 Gozanti
- 7 Squadrons
This fleet tires to combine the following strategies:
- Fielding a close to invincible Executor (thanks to several upgrades throughout the fleet: Damage Control Officer, Capitain Brunson, Shields to Maximum!, Executor-title, Projection Experts, Targeting Scramblers, Interdictor-title, Hand of Justice-title, Repair Crews, Comms Net)
- Making it difficult to avoid the front arc of this Executor (thanks to several tractor beam upgrades [on the SSD, the Cymoon, and on both Gozanti], and G-8 on the Interdictor)
- Assuming many large rebel ships, I decided not to use XI7, but to wear down enemy shields via Heavy Ion Emplacements.
- In order to deal with the rebel bomber hell, I choose my squads simply to take out enemy squads without serious bomber capabilites on my side (apart from Captain Jonus for triggering my Quad Turbolaser Cannons). Those squads should be pushed by my Quasar. For even more anti-squad fire power I included Agent Kallus and Quad Turbolaser Turrets on the SSD.
This seemed to me a well balanced approach. What would LTD bring to the table? Guess what: the longest Ackbar Conga line you can dream of: 10 AFMK II with Gunnery Team, Enhanced Armament and Electronic Countermeasures. For guaranteed Accuracies he included a MC80 Command Cruiser with nothing but the Home One-title. Ackbar himself sits on a Pelta with Intensify Firepower! and some other upgrades. No squads at all.
Yeah, that meant I would have wasted a lott of points in my fleet, not to mention the opportunity costs:
- The entire anti-squad strategy was worthless; this means nearly all my squads and a fully decked out Quasar; in addition Agent Kallus and the Quad Turbolaser Turrets are totally superfluous.
- The tractor beams on the Gozanti (meant to slow down these quick rebel small base ships) are also wasted points
Because I have a lot of dead weight in my fleet, I hoped that I could swing the situation still in my favour by taking out Ackbar early. Allthough I had no bombers, I hoped that my squads could at least help a little bit when hunting down that Pelta. A clever drop of Demolisher from my Hyperspace Reserves should do the rest to this flagship. This was my plan, before we started the game setup.
During setup I chose LTD's objective The Droids that you Search (an improved version of Capture the VIP). He chose my Ambush (an improved version of Fleet Ambush). I was elated this allowed me to force him to place his flagship in the ambush zone. I hoped to kill Ackbar already in round 2 - which would even be sweeter, because it had all his Droids that I do search for on board (worth of 300 victory points).
This was the state of the board after the game setup:
LTD set aside as Hyperspace Reserve 3 of his Assault Frigates. I set aside the Cymoon, the Interdictor, Demolisher, and the Hand of Justice. My reasoning for this was the following:
- The Cymoon should be deployed later in a way that guarantees at least two enemy ships in its front arc.
- Demo should later go on hunt for Ackbar behind the enemy lines.
- The Interdictor is meant to be dropped close to the front of the SSD in order that its scrambler can do its work, but also that the enemy ships close to the SSD are in range of the Interdictor's G-8.
- The Hand of Justice should also be dropped close to the SSD, but in a way that allows for it to survive for some rounds.
This is maybe not a a perfect plan, but a decent one, right? Now, you need to look where I have placed my Hyperspace tokens. One is in the upper right corner, one behind Home One, and one middle to left side, but far from the place where I later dropped my SSD. I deployed my fleet in a way that all the ships that need to be close to the SSD could not be dropped close to it. You think this is stupid? Wait and take a closer look at the token in the upper right. My Grand Battle rules demand that ships dropping out of Hyperspace need to overlap the tokens with their front shield dial. But this token can only be overlapped in such a way, when you drop a ship in way that it flies of the board with its very first activation! That is true stupidity! Never think that someone who has written a rule is able to play according to them...
LTD placed his Pelta to run for Ackbar's life. My squadrons were ready to chase him (we decided as squadron placement rule for the SSD that they have to be within distance 5 of one's player edge and within distance 2 of the ship)
Round 1 was already a disaster for me. LTD first moved the Pelta in a way that only two my squalled squads could reach it (for only 1 shield damage). With 1 shot LTD managed to take the Quasar to hull 1. Because I stupidly used the pass mechanism of the SSD the Comms Net Gozanti died before it ever activated (and thereby rendered the Executor-title as useless as all the anti-squad upgrades). The Ambush objective I had picked turned out to be a total catastrophe: the Ackbar volleys hit hard already in round 1, but Ackbar was immediately in his deployment zone with nearly no damage. At the end of the round I had lost the Gozanti, the Quasar, and the SSD got some minor scratches in its shields. LTD had lost nuttin, but Home One lost some shields and one of his 1´0 Assault Frigates is severly harmed (and will most likely die very soon).
But he achieved an enormously important navigational feat. Let us take a look at the state of the board at the end of round 1:
Take a look at my Hyperspace token behind Home One. Yes, it is overlapped by HIS AFMK II. If you keep in mind that I need to overlap it with at least one of my ships I want to deploy there, you recognize that I cannot use it for deployment in round 2. The other one in the upper right corner I cannot use anyway. That leaves for me only the one far from the action. In effect that means that I cannot bring in my Hyperspace Reserves at all, whereas LTD has two spots for nice deployment. Round 1 was dark for me. But, oh boy, it was nothing compared to what will happen to me in round 2.
Hopefully, Vader has some dark side carrots with him!
P.S.: For LTD's perspective on the match click here!
Grand Battles: An Epic Play Alternative to the Sector Fleet Rules
FFG has finally released rules for battles beyond the 400 point limt: the Sector Fleet rules. Those rules are divided in two parts, the actual rules for epic fleets and a teamplay gaming mode for those fleets. For the purpose of this article, I am only interested in the first part.
What do the epic play rules consist in? In a nutshell it is:
- Battles can be fought with 600, 800, 1000, and 1200 fleet points per side.
- Such fleets cannot have more than three flotillas (instead of 2).
- A maximum of 25% of the maximum fleet points can be dedicated to squadrons (instead of 33%).
- For 1000 and 1200 point games the short edges of the setup area are in distance 3 to the short edges of the play area (instead of distance 5).
- There is a MoV table for such games, if they are used for tournaments.
And that's it.
Challenges for Epic Play in Armada
Before I evaluate those rules, I want to address the challanges it poses to introduce an epic play mode to Armada.
Increasing the point limit to a higher value than 400 points seems to be the a tempting step for everybody who has dreamed of fielding a true Armada. But because the game is optimized for 400 fleet points this creates many imbalances:
- Most importantly, the asymmetry of first player and objective play does not cope well with increased fleet points. This is the case for several reasons. First, the advantage of the first player decreases with higher points, because most likely the higher amount of plastic in the play area creates several conflict zones. The advantage of the first activation helps in only one of them. Second, some of the objectives are marginalized by the higher point fleets. Whereas 75 points for a successful intel sweep are great in standard games, they are barely worth mentioning in a 1200 points game. Although these two aspects cancel each other out to a certain degree, the entire first player/objective asymmetry becomes at best pointless. Third, some objectives even become ridiculous: if two 1200 point fleets try to score victory tokens from one tiny Contested Outpost, the game becomes a parody of itself, full of unintentional ramming.
- Two other aspects of the game that do not scale well with increased fleet points are deployment and maneuvering finesse. As experienced players of Star Wars: Armada know, avoiding enemy fire, circling the enemy fleet, or concentrating your forces in a tight spot are a challenging and rewarding aspect of the game. Although the game is played in a 3’ x 6’ play area, the tactics of game demand quite often to avoid large parts of that play area and to focus on other parts. This is less possible the higher the fleet points are increased: So much plastic is in the play area, that deploying and maneuvering the entire fleet around certain parts becomes impossible. An important aspect of the game dies.
Sector Fleet Rules?
Now, how do the Sector Fleet rules address these problems? The answer is quite sobering. The first aspect is close to completely ignored. There is a sentence on page 4 that tells us that higher points change this aspect, but considering actual rules there is nothing there.
The second point is also close to ignored. Although there is a increased setup area, this is only the case for 1000+ point battles. That means that we play games with twice the fleet points in exactly the same setup area as in 400 point battles. And in games with thrice (!) the standard fleet points, the setup area grows by negligible 25%.
Maybe three and a half sentences are not enough to take a game designed for 400 fleet points to thrice its size...
In the next paragraphs I want to introduce two other official solutions. Each of them has its own problems. However, I believe that we can take them in order to gain a well balanced epic play solution for Star Wars: Armada.
alternating First Player Advantage
Page 14 of the Rules Reference Guide offers under the headline Unlimited Rounds an option where the First Player advantage alternates. That means that every odd round one player is first player and every even round his opponent dons this role. This seems to be a neat solution for epic play where the asymmetry of first player and objectives is heavily marginalized.
However, I think there are three reasons that speak against this solution:
- The problem of limited maneuvering and deployment space is not addressed at all.
- The player who is second player in round 2 and first player in round 3 is very likely to get the two most important activations of the game: last of round 2, first of round 3. What looks like a symmetry is it in fact not.
- This option ditches objectives. Because the multitude of objectives contributes a lot to the tactical variety, it would make Star Wars: Armada less rich in its replay value.
The All-Out-Offensive of Corellian Conflict
The campaign expansion Corellian Conflict introduces rules for 1000 to 1500 fleet points. A larger setup area (and a larger play area for 1500 points) are used. In addition, not all ships are initially deployed thanks to the hyperspace reserves mechanism. They get deployed during later game rounds, resulting in more space in the setup and the play area.
For me, those are the most promising rules for the problem of limited space in epic play matches. Nevertheless, I still see some problems:
- First, we obviously do not get here the tactical variety of the objectives either.
- These rules have a strong second player bias. As has been mentioned above, the first player advantage is marginalized in games with more than 400 fleet points. But in contrast the second player gets the advantage of deploying his hyperspace reserve after the first player - and thanks to the additional spawning point even with more flexibility. Whoever has played Raddus (or against him) knows that it is an extreme advantage to deploy one's ships in the middle of the battle field when the enemy ships are already present.
- When we are already talkling about Raddus: deploying one's heavy hitters close to freely in the play area is borderline boring. They can be deployed for perfect double arcs. No maneuvering finesse, no planning in advance is needed. Another important aspect of the game is marginalized.
The Solution: The Grand Battle Rules
The Grand Battle rules I want to introduce aim at keeping the strengths of the different approaches - and hopes that the disadvantages cancel each other out. In a nutshell, the rules consist in three basic principles:
- The first player advantage alternates.
- Hyperspace Reserves rules similar to those of the all-out-offensive are used. They give us the same deployment and maneuvering space. But the second player/first player advantage of round 2/3 is compensated by the second player's hyperspace reserves deployment advantage. But this one is also mitigated by the alternating first player role. However, the deployment of the hyperspace reserve is anyway constrained in order to avoid Raddus like drops for perfect double arcs.
- There are 15 new objectives for Grand Battles. These objectives are designed in a way that they scale well with increased fleet points. However, the Grand Battle rules do not work with only one objective per match. In contrast, each side has its individual objective during a match. Whereas one side might need to break a blockade, the other side might want to test an early prototype of the Death Star super laser technology. This aims at offering a deep tactical variety and a high replay value, because every time not only different fleets, but also different objectives have to face each other.
Curious? Click here to download the Grand Battle rules!
Some caveats:
- The link provides an English as well as a German document. Both are up to date and complete. It does not matter which one you pick.
- Don't be deterred by the size of the document (roughly 15 pages). The actual rules are roughly 2 pages plus the new objectives. The rest is due to formatting reasons, explanations, and options.
- I did not have the time for checking spelling mistakes and I am not a native speaker. Please excuse the lack of proper spelling and grammar.
- Yes, some of the objectives are quite complicated to read (especially the Super Laser Prototype Test). However, they are not complicated to play as soon as you have understood how they work. Promise!
- Everything is completelly untested! Be a playtester! :-D
Turning a Trap - Round 1
This article is a sequel to Turning a Trap - Prologue. It is recommended to read the prologue first in order to understand the nature and the context of this article. Todays part covers the battle from ship deployment to right before the start of the ship phase of the second game round.
"We are supposed not jump with the rest of the fleet, Sir?", the incredulous voice of the captain sounded from the comms mudule . "In deed, captain! Jump the Chimaera to a point in safe
distance of the nebula gate", Thrawn explained patiently a second time.
"But, Sir...", the officer tried to reply.
"Captian! We want to know where and how the enemy fleet is located, before we field our flagship, don't we?", Thrawn interrupted, this time with a not so patient voice.
"Hence, I have sent the quasar as a Vanguard with the two decimators. And hence, the Chimaera will enter the battle field by a second hyperspace jump after we have proper intelligence of the situation. Is this understood, captain?"
"Yes, Sir!", the captain replied, this time without hesitation. Thrawn knew how dangerous a pack of hammerhead corvettes could be even for an imperial star destroyer, if they managed to approach the bigger ship idealy. It was not his plan to give them the opportunity.
Again he turned to the space hologram of the Nebula Gate. Again and again he considered the vectors of the squadrons and the ideal dog fight locations. He logged the simulation into the coordination framework of the Chimaera. He knew that the squadron fights of this battle would be decisive - supposed Solo's trap was not more dangerous than expected.
My opponent Visovics decided to deploy one quasar (and later 2 decimator squadrons) first in the center of his deployment zone right across the Nebula Gate. Because he had way mor squadrons for the initial deployment than me (22 to 12) he was more than able to even out my higher number of ships and thereby delaying the deployment of the Chimaera to a point where I had already deployed a major part of my fleet.
"There they are! Merely one star destroyer!", Hera's voice sounded from the speaker. Han laughed in relief and replied:
"And you have been right, General Syndulla. Maneuvering our units offside the Nebula Gate resulted in deed in a scattered imperial fleet. At least the quasar is nothing we need to worry about soon. Congratulations!"
Everything seemed to go according to the plan. But then Chewie howeld.
"What? Another star destroyer is approaching from hyperspace? What? It wasn't part of the fleet? Damn!"
Han called the Ghost again.
"Already seen, General Solo", Hera's voice sounded, "that is Thrawn's flagship, the Chimaera."
"Yes, directly heading to the Phonix Home and the Yavaris!", Han replied.
"What...Chewie? That still isn't all? Another fleet is approaching?", Han shouted as the Wookie continued to howl. Again the comms module established a link to the Ghost:
"General Solo, the approaching second fleet contains at least a third star destroyer. We need to stick to our plan. Now it is in your hands. May the force be with you!"
"Yes, Chewie", Han yelled hastily as the comms module went silent, "I have a bad feeling as well."
He looked at the hammerhead corvettes. The falcon was in some distance of the other squadrons - right at the other end of the rebel fleet. On his own he was supposed to circumvent the enemy squadrons and hot wire the enemy hyperspace entry points. Would his plan succeed to divert the attention of the enemy squadrons from the Falcon due to the swarms of X-Wings on the other side of the fleet?
The basic idea of my deployment was to get my fleet as far as possible from the center and therby from the enemy hyperspace tokens. Because of my four wider distributed hyperspace points I could still attack the rear of the opposing fleet, whereas Vicovics' could merely with one exception deploy his reinforcements far from the main battle. And this one hyperspace token I wanted to move as far from my fleet as possible with the Falcon.
It went nicely for me that the quasar (the very first deployment of the game) was deployed in the center. Because I deployed as far to the left as possible (first the Yavaris, then all my Squads except of the Falcon and the Ghost) I could lure Visovics in deploying his remaining units more to the left as well - which resulted in his quasar to be far from the battle. Both star destroyers of his main fleet had been deployed on the far left as well - especially the Chimaera, which was thanks to this in safe distance from my hyperspace points and thereby from my Mon Calamari big cannons.
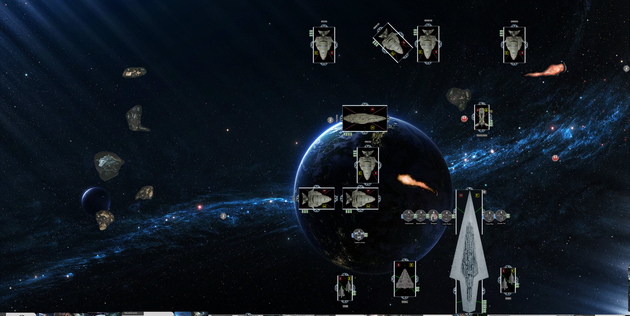
The following image shows the state of the game after deployment (click to enlarge):

Thrawn knew that his positioning was not ideal. The quasar was to far from the battle - and the enemy reinforcements could arrive directly in their rear.
"Grand admiral, four enemy ships are approaching from hyperspace", his first officer reported.
Four ships. Even the strongest ships the rebels commanded at the moment were merely assault frigates mark II. Even four of them could pose no threat to his fleet - even if they arrived in their rear.
"Bring in the quasar as fast as possible. All other units approach the enemy slowly; all other ships - apart from the Chimaera! Full speed to the Phoenix Home, captain!", Thrawn commanded.
"But, Sir!", the captain spluttered.
"Catpain, proceed as commanded!", Thrawn hissed, "or do you want the Chimaere being ripped apart by those hammerhead corvettes?"
"Aye, aye, Sir!", the captain replied.
During the first round nothing spectacular happened for some time. All ships were slowly approaching each other. The hammerheads turned a bit in order to get into close combat with the star destroyers. Suprisingly, the Chimaera charged with speed 3 - what made possible that she circumvented the hammerhead attacks completelly. After all imperial ships had been moved, I still had 3 ships to activate - which allowed me to pull off the following:
"General Solo, here is Captain Tallon fron the Phoenix Home. It is time for your mission!", it sounded from the Falcon's speakers.
"Go, Chewie!", Han yelled. They were forced into their seats as a loud drumming noise sounded and the engines of the Falcon went to maximum power. Chewie giggled, which sounded like a cackle, as they left the hammerhead corvettes behind.
"Now!"
Following the command, Chewie rose and skeltered to the cargo area in order to activate the hot wiring device.
"General Solo, Yavaris here. It works! But this is still not far enough from our fleet!"
Han turned the Falcon a bit, but did not decrease speed. Chewie roared from the cargo area.
"Done? Great!", Han replied. He murmered to himself: "Let's find some cover behind these asteroids over there."
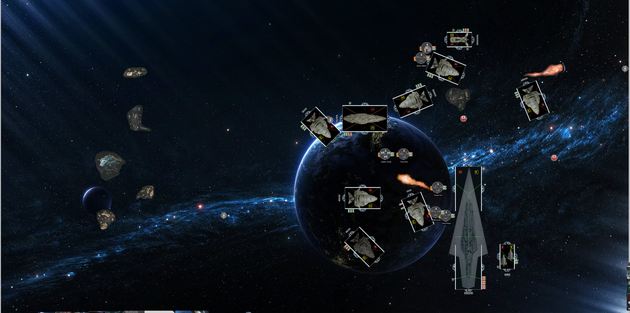
Via a squadron command first the Phonix Home activated the Falcon. Han moved the hyperspace token of the imperial fleet for the first time. Adar Tallon toggled the activation slider back.
Now, Yavaris activated the Falcon a second time in order to move the token even further away - see the picture to the right (click to enlarge).
After that, during the first activations of the squadron phase not much happened - until the following scene took place:
"Wedge, this is the Ghost. I think Saber Squadron is approaching. Its trajectory seems to imply that they want to hunt down the Moldy Crow. We cannot accept losing our intelligence computers there. Try to intercept!"
"Aye, Sir, we will deal with them", Wedge replied. Intercepting an enemy squadron on its way to work - probably no one in the entire Galaxy was experienced as Wedge for such a job .
"Red Squadron, follow me!", he commanded as trained so often before. He brought his squadron relative to the approaching Tie interceptors to a high ground. Now they were right between Saber Squadron and the Yavaris and therefor more difficult to spot. Wedge detected the red ribbon on the Ties. It really was Saber Squadron!
"Now!", he shouted in the comms module. His squadron increased speed, turned a bit und started to fire by simulatneously approaching Saber Squadron from above. Half a looping and Wedge was right behind the enemy squadron leader. With a bright explosion the Tie in front of him was gone for good. Merely a few seconds had passed and the entire Saber Squadron was annihilated.
"All to easy!", Wedge laughed.
"Red leader, I am hi...aaargh", he heared from the comms module. Wedge turned his head. A YV-666 transport approached them and had started to fire. Bossk - that headhunter scum!
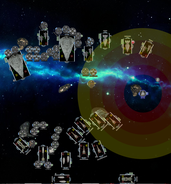
After my opponent moved Saber Squadron close to my squadrons during the squadron phase, I was able to activate Wedge. Due to the Ghost he had the 'rogue' keyword. Hence, he could move and fire. Because the enemy squadron had already been activated, Wedge had 6 dice. Three of them were hits - enough to destroy Saber Squadron within one activation. However, Wedge had to face Bossk's retaliation, which resulted in Wedge losing 1 hull point. Both can be seen on the following pictures (click to enlarge):


"Ghost, this is the Falcon! Behind me the third star destroyer has appeared out of Hyperspace!"
Han started hastily a turn.
"We have seen it. It flies directly into the side of our hammerhead formation!", Hera responded. Han saw the catastrophe. The star destroyer could target the hammerheads in point blank range from his front firing arc.
In addition even more squadrons appeared...and close to the Nebula Gate another Arquittens light cruiser left hyperspace. With even more squadrons!
"That is too much. We can not deal with that fire power! All units, prepare for retreat!", Han heared Hera's voice saying.
"We won't get another chance for this", Han responded with gritted teeth, "we got to give our reinforcments more time."
But then, with a loud boom four ships came out of hyperspce. A comms channel opened up: "This is Admiral Raddus of the Rebel Alliance. All units report in!"
After Visovics deployed the Avenger right in the side of my hammerheads and another Arquittens offside, it was my turn to bring in my reinforcements. I decided to deploy all of them at once. Defiance, Home One (which's belly festered with 4 B-Wing squadrons due to Rapid Launch Bays), and Endeavor I deployed in the rear of the enemy fleet. Liberty and 2 B-Wings left next to the Quasar hyperspace in order to take the carrier immediatelly out of the game. The following image presents the state of the game right after reinforcements had been deployed at the beginning of round 2 (click to enlarge):

In one of my next articles you will be able to read, how the battle went on. Stay tuned!
To be continued...
Turning a Trap - Prologue
This article is a battle report of a different kind. That it is one of a different kind is due to the fact that the game itself was anything but ordinary. It was not a standard game of Star Wars: Armada where two fleets of 400 points would fight against each other according to the well known rules. In this game two fleets of a size of 1500 (!) points per side faced each other on VASSAL.
But what is special about this battle report? I want to tell it in form of a story, but again a story of a different kind. The point of this story will be that it will be interrupted for explanations and pictures of what happened on the virtual gaming table. I want to interpose the rules and decisions the players made in the game .
And with that enough has been said. The prologue can start. It covers fleet design and the part of the game setup before fleets are deployed.
Thrawn was in his private rooms of his flagship, the Imperial Star Destryoer Chimaera. He pondered the imminating conflict. General Solo was a gambler. Of course Solo knew that he knew it: Solo was preparing a trap. The rebel led a major part of the rebel alliance fleet to the Nebula Gate – a strange space anomaly between two space trade stations. Solo had taken some care that Thrawn discovered its strength: 13 capital ships and close to 10 squadrons of starfighters.
Grand Admiral Thrawn considered it to be an insult how stupidly scrambled the rebel communication was and how obviously prepared the trap. Of course Solo knew that a major part of the 7th Fleet was in the sector. The imperial spy droids even reported that the scrambled figures about the strength of the rebel fleet were correct. Mostly retrofitted transports, some even from the clone wars era: Pelta class, Hammerhead class, a Nebulon B, and even some GR75 transports.
What bothered Thrawn were the rebel reinforcements. The also intentionally stupidly scrambled call for help mentioned two Assault Frigates. But even with them, the rebel fleet was no match for the 7th Fleet. It was a trap. And like every good trap, it was not obvious what the trap did consist in.
But nothing is as satisfactory like turning a trap, Thrawn mused. He pulled some strings within the imperial navy. Old friends, the Blood Crow Gozanti class and the Thunder Wasp Arquittens class were on their way to accompany his fleet. Thrawn managed to get in addition another Star Destroyer, the Avenger, and a second Quasar to his help. He even had a special surprise for Solo up his sleeve: The bounty hunter Boba Fett could be allured to settle his score with that rascal smuggler wanna be general. Even if the rebels would bring in twice the number of Assault Frigates, they would be severely outnumbered.
But Thrawn had bigger troubles than the rebel reinforcements arriving. Unpleasant imperial help was on the way: Darth Vader heeded the call as well. The incalculable dark lord could make a mess out of Thrawn's well developed plans. Most likely he would take over the command and sacrifice everything in order to get this Luke Skywalker in his hands.
Thrawn had to act immediately. If the battle was already raging before his reinforcements arrived – before Vader arrived – the dark lord would have less time to ruin everything. The Grand Admiral gave the order to jump to the Nebula Gate. The battle would start right when the rebel fleet tried to pass the gate.
"So, General Solo," Thrawn thought, "let us see, how often this trap will be turned!"
Han liked a good game. And he liked it especially, if it was rigged. But he was not sure, who rigged this one. Chewie was growling next to him. “Yes, I know! Our new friends need to be good. Really good. In fact, to be better than our entire fleet!” Hopefully, Mon Mothma's estimation that this new alliance might turn the tables was correct. He looked out of the window of the Falcon. Stupid transports! 6 Hammerhead transports with hastily on the external hull attached ordonance racks; 4 unarmed transports grouped into two flotillas; two clone wars era medical pelta ships retrofitted for fleet commanding, but not – not at all! - ready to face several Imperial Star Destroyers. And a lonely Nebulon B frigate. This was suicide. Hopefully, farmer boy and his starfighters would work some wonders!
“Chewie, check those flashy hyperspace hot wiring devices Madame Syndulla came up with! We really need them to work.” He was a gambler. Hera was not. Did this mean that if she trusted those devices, they would work? Everything depended on hot wiring the hyperspace points were the imperial big guns would appear – and even more where their own 'new friends' would arrive. Their 'new friends' – ha! So, when they appear their 'skilled' Admiral would take over command. Four ships! Merely four ships their help did consist in! He couldn't see how that would help against several Imperial Star Destroyers. Solo had already 13 ships in his fleet – and they had no chance against the imperial fleet this Thrawn guy was commanding. How could four ships make a difference? Hopefully, not the entire 7th Fleet would arrive. Of course Thrawn expected a trap. Hence, Han ordered to bluff by scrambling some talk about two Assault Frigates. With so little forces expected, would Thrawn merely send a vanguard to the battle? On the other hand, even with four more ships a vanguard still meant a serious battle. Han laughed bitterly to himself. At least their 'new friends' had some flashy names for their ships: Defiance, Home One, Endeavor, and Liberty. Soon the rebels would see what the Mon Calamari, their 'new friends', would bring to the table!
The rules used were nearly identical to those of the all out offensive of the Correlian Conflict campaign. The most important difference was that merely two fleets of a strength of 1500 points each participated here, not 3 per side of 500 points each. In addition there was merely one fleet commander per side (namely Thrwan and Raddus, who had been declared to be part of the rebel reinforcements during the game setup). Everything else was similar, namely:
- No objectives.
- Seven game rounds.
- Each side had to keep parts of its fleet in reinforcments (they were the 'contacts' Thrawn thought about as well as the the 'new friends' of the rebel alliance).
- Hyperspace points have been placed on the board. There the reinforcements would arrive.
- The first player advantage is the same as in a normal game (however mitigated by the fact that in a case of so many ships the first activation is not as important as in a standard game). In addiation the first player has to deploy his 3 hyperspace points first and he can deny specific areas for the hyperspace points of the second player (because all hyperspace points have to be further away from each other than distance 5.
- The second player has the advantage that he declares his reinforcements after the first player declared his. In addition he deploys his reinforcements after the first player and is thereby able to adjust his tactics.
My opponent (forum name Visovics in the FFG forum) chose the imperial side, I played the rebel alliance. At the point the prologue ended, merely fleets had been composed, obstacles deployed, hyperspace points placed, and reinforcements declared.
For fleet composition we worked with some additional rules:
- There had to be at least 1 ISD and 1 MC80 in game. They had to be the flagships.
- The following squadrons had to be in game: Darht Vader, Boba Fett, Luke, Wedge, Biggs, Han Solo, and Hera Syndulla.
- The following generic squadrons could not be chosen: Firesprays, Aggressors, Jumpmasters, YV-666, YT2400, YT1300, Lancer, HWK, VCX.
- Because this meant that the rebels had no way to get the key words Strategic and Relay, the Millenium Falcon and the Ghost got each of them (which were the hot wiring devices Solo mentioned in the prologue).
The fleet of the empire (without reinforcements) consisted in the following units (for a more detailed list click here; one simply has to add the title Chimaere to the flagship as well as the Fleet Command Intensify Fire):
- 2 ISD
- 1 Quasar
- 2 Arquittens
- 3 Gozanti
- 22 squadrons
The imperial reinforcments consisted in (for a more detailed list click here):
- 1 ISD
- 1 Quasar
- 1 Arquitens
- 1 Gozanti
- 11 squadrons (among them Darth Vader and Boba Fett)
The fleet of the rebel alliance (without reinforcements) consisted in the following units (for a more detailed list click here):
- 2 Pelta
- Yavaris
- 6 Hammerheads
- 2 GR75
- 12 squadrons (among them the Millenium Falcon and the Ghost)
The rebel reinforcments consisted in (for a more detailed list click here):
- Defiance (with Admiral Raddus as Fleet Commander)
-
Home One
- Endeavor
- Liberty
- 8 B-Wing Squadrons
The following image presents the state of the game after placing obstacles and hyperspace points:

In the center there is the Nebula Gate, which is mentioned in the story several times: the passage that is formed by the two nebula obstacles. The player edge of my opponent is on the top whereas mine is on the bottom.
The entire point of my fleet is that a major part (nearly half of its fleet points) is still in hyperspace. Because I have chosen Admiral Raddus as fleet commander, it was possible to move four large base Mon Calamari ships into the reinforcements (including Raddus). Because of that the story mentions Han Solo as commander (allthough he is not according to the rules) - and it is said that the arriving Admiral will take command.
In der Mitte befindet sich das Nebeltor, von der in der Erzählung die Rede war: nämlich die Passage zwischen den beiden Nebel-Hindernissen. Der Startzone meines Gegners ist oben, meine Rebellenschiffe werden unten platziert werden.
My basic strategy is simple: I want to deploy my four big guns in the rear of my opponent - resulting his ships being nearly unable to defend themselves. Hera and Han have to move the hyperspace points of my opponent out of reach that his reinforcements will not cross my plans.
Will it work? Read the next article! Until then I will chew some dark side carrots.
To be continued
Armada: Why to start at all?
After I wrote some time ago two articles (in German) about the question which expansions are a cost-efficient way to get into the game, it dawned on me that I had taken the second step before the first. Foremost, it is necessary to explain why one should start with Armada at all. It is necessary to rouse the people. The spark needs to be ignited!
Immediately, I knew that this is not an easy task. To elate people - this is a challenge where overpaid ad writers and professional speakers shipwreck. It was clear to me: I need to squeeze all that there is of rhetoric force out of language and to sound the deepest semantic nuances of expressivity.
So, I sat down. I wrote. The first draft I tore to pieces. I continued to write. Deep into the night I sat with candlelight at my old wooden desk. And no sound could be heard except of the quill scraping the paper. Again and again I changed the text, improved it - never completely satisfied with the result. However, as morning dawned, I recognized: I had reached my goal. I had composed a work that danced on the borders of human expressivity and even achieved to set them off to regions before unknown. I knew that I would never again write an article of such strength, an article - it is almost tawdry to say - that radiates such beauty!
I had discovered that the entire subject, the entire problem why people should start playing Armada could be reduced to exactly three reasons. There are other games played. Good games! And many people are by nature sceptics. However, these three reasons will silence all and force them to devoutly nod in agreement. Here they are - the three striking reasons for giving up one's way of living and starting to play Armada:
The First Reason
The Second Reason

The Third Reason
Now, that I have published these reasons I have to confess that I might have been over enthusiastic - that a creator's pride might have taken me away and clouded my judgement. Are these really the best three reasons for Armada one can give? No, I do not think so. To many doubts remain, simply to many questions are not answered. Are really by these reasons people convinced who have lost all their fortune and who have no money left to spend for gaming? Are really people convinced who have to care for spouse and child and have to spend all their time self-sacrificingly for their family? Finally, are really people convinced who consider board games to be boring and prefer all the ecstatic moments of life - extreme sports, drugs, sex?
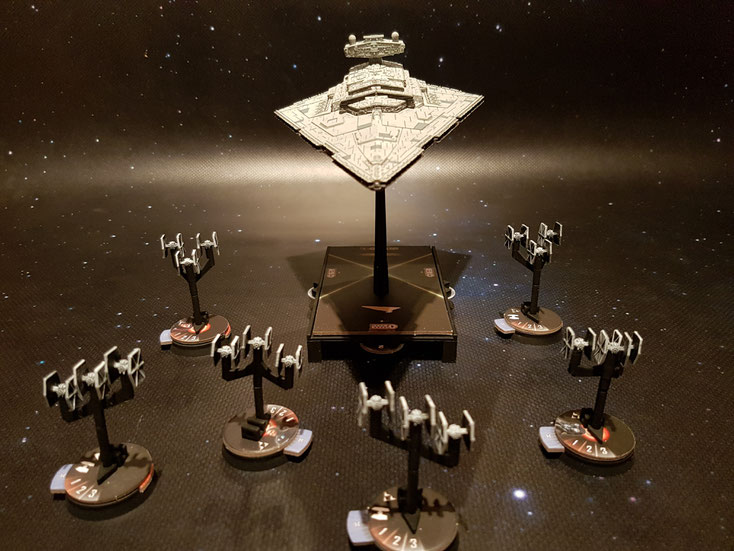
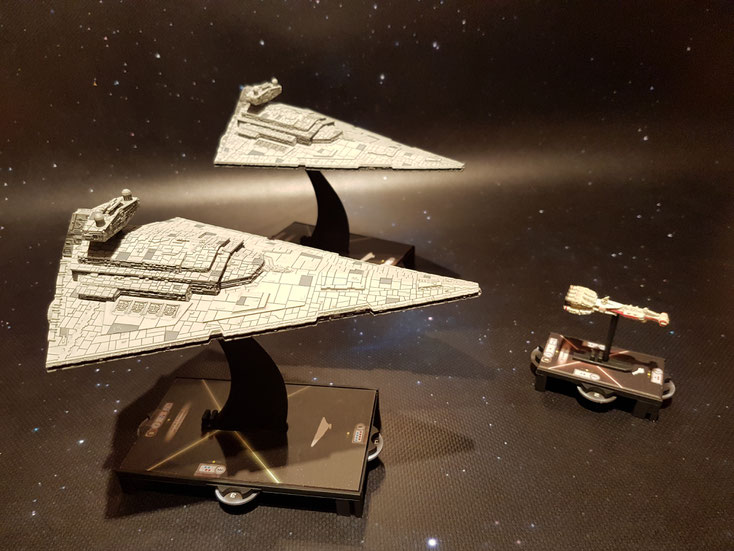
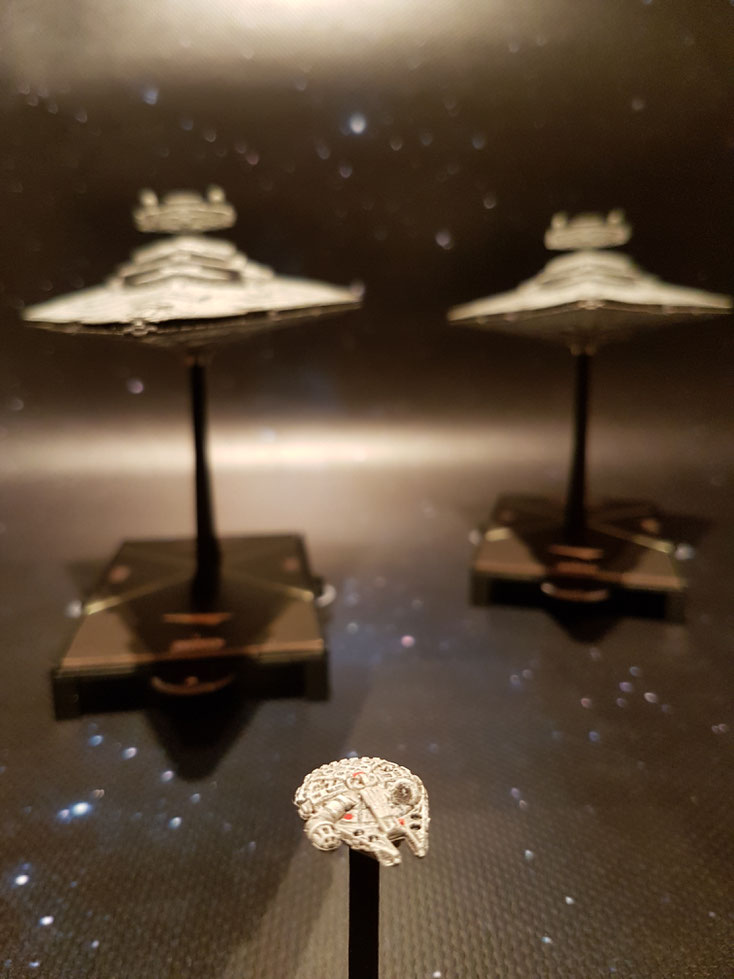
I cannot believe that. The three reasons are simply not good enough. What are three simple images depicting a single Star Destroyer? We need better arguments! And we need not to be at loss for them. Here they are! The three irrefutable, the three unquestionable arguments for Armada that will convince every, really every human being on this planet:
The First Irrefutable Reason
The Second Irrefutable Reason
The Third Irrefutable Reason
